If you need help understanding and using any of Stamp Collecting Spot’s features, please refer to the expandable documentation below.
If nothing below provides the help you need, please contact us and we’ll do our utmost to help.
- Make sure to fill out the Registration form
- Double check that your email is correct. The email must be correct in order for you to receive your account activation link.
- After clicking “Register”, check your email inbox for a confirmation email containing your activation link. Follow the directions in that email.
From there, you should be good to go!
Didn’t receive a confirmation email?
You may have entered your email incorrectly on the registration form. If you are certain this is the case, you can create a new account using the correct email. You can also contact us and we will be happy to help get your account activated.
Sometimes emails take an abnormally long time to deliver, so if you are sure you entered the correct email when registering, this may be the case in your situation. If you still receive no confirmation email within the next couple of hours, please contact us and we will help you get your account sorted out.
Still having trouble?
If you are still experiencing problems with signing up, please let us know! Typically, you will receive a response within several hours, although in some cases it may take longer.
- Double check that you are entering the correct email (or username) and password, into the correct fields. The correct email, username, and password are the ones you originally signed up with.
- Enter the email or username you signed up with into the “Username or E-mail” form, then click the “Forgot your password?” link.
If you’re still having trouble, we can help you recover your account.
- Check the spam or junk mail folders in the email account associated with your Stamp Collecting Spot account.
- Try to reset your password again.
Still no success? We can help you recover your account.
If you already signed up but would like to change your name, go to your profile, click the “About” tab, and from there you will see the option to edit your first and last names.
- In the first section, “Account”, you can change the email address associated with your account, change your account password, or delete your account.
- The next section, “Privacy”, allows you to choose who can view different sections of your profile, and who can message you.
- The next section shows any users you have blocked.
- The final section allows you to change your email and on-site notification preferences.
Profile Image

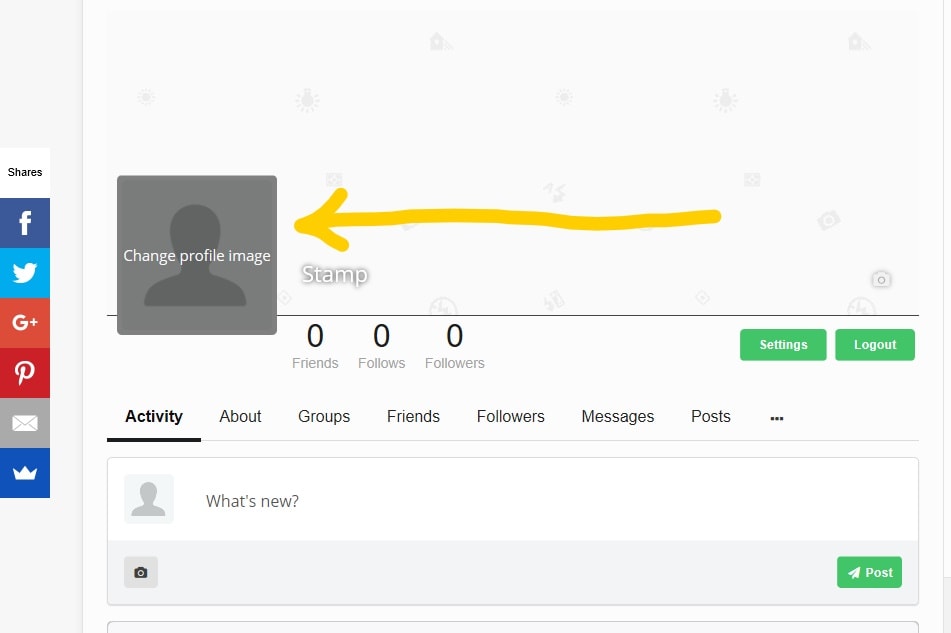
To add a profile image, click on the default one, then click “Upload photo”. Choose an image from your computer as your profile image. Consider compressing the image first. Compressed images will load faster, and are less likely to generate an error. Use this site to compress your images.
Cover Image

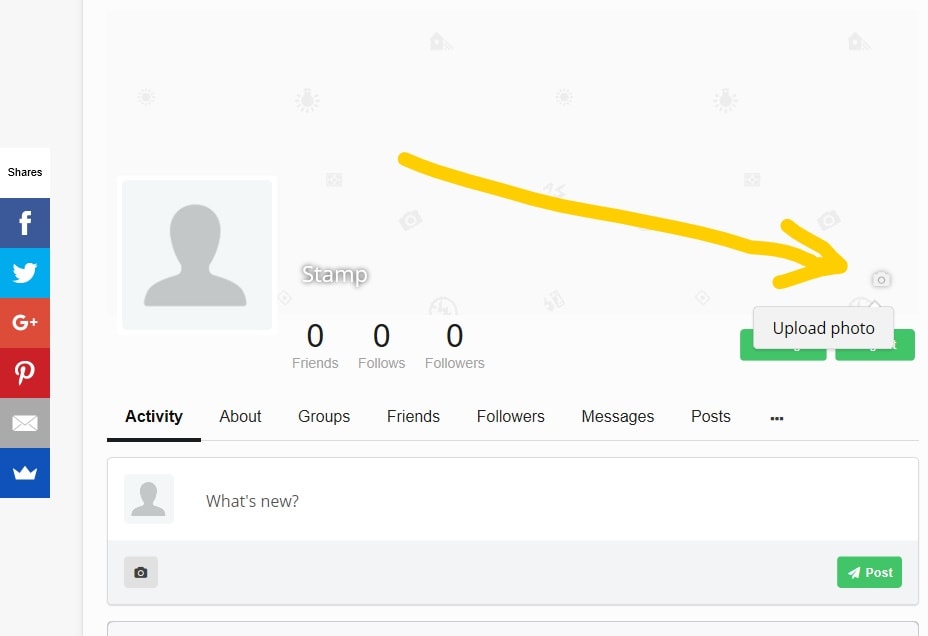
To add a cover image, click the camera icon located at the lower right (see screenshot above) and then click “Upload photo”. Choose an image from your computer, and consider compressing it if it’s not already.
- Change the image file size. Stamp Collecting Spot only supports files that are 5mb (megabytes) or less. Use this site to compress your image(s) without losing quality.
- Resize the image. Make it no more than 1,000px at its longest side.
If size is not the issue, you can:
- Use a different browser
- Use a different device (a computer may work better than a mobile phone or tablet).
There are three tabs on your About page, titled Main, About, and Contact Info.
- Main is where people can see your name, and also where you can go to edit your name.
- About is where you can share a brief bio, your collecting interests, what your education is, where you work, etc.
- Contact Info is where you can share your website URL (if you have one), and links to your profiles on Facebook, Twitter, Google+, and LinkedIn. Note: personal contact info (like email and phone number) is excluded for privacy reasons.
In order to see more specific activities, click the “Site wide” filter and select an option from the drop-down list. From the same drop-down, you can select and de-select each activity type, customizing what is shown to you on the Activity page.
You can also post directly to the Activity page from the “What’s new?” box.
Each group has an Activity page, a Members page, and a Settings page.
- The Activity page shows a list of all group activity updates made by members of the group. Depending on the group’s privacy level, these activity updates may or may not be visible to non-members.
- The Members page displays a list of each member of the group.
- The Settings page allows the group administrator(s) to:
- Update the group name
- Update the group description
- Delete the group
- Adjust the group privacy level
- Add tags to help categorize the group
As a member of a group, and as long as the administrator(s) have allowed it in the group settings, you can invite any of your friends to the group by clicking the three vertical dots located at the bottom right of the group cover image and then clicking “Invite friends”.
You can also choose to block a group be clicking the same vertical dots button, and then clicking the “Block group” option.
- The Members page, by clicking the Message button on a user card.
- Another member’s profile, by clicking the Message button located below their cover photo.
- Your profile, by clicking the Messages tab and then the “New conversation” button.
At this time, private messages only support text.
- Hover over: Directory >> My Dashboard then click Add Business.
- Fill out the listing form. Required fields are marked with an asterisk (*) sign.
- After solving the Captcha, click “PLACE LISTING”.
TIP: If you need to upload PDFs to your listing, first upload them to a file-sharing website and then add the link to the Listing Description.
- Hover over Directory >> My Dashboard and then click Manage Listings.
- Locate the listing you’d like to edit, and click the Edit button next to the red Delete button.
- Fill out/edit the fields you’d like to change. Note that required fields are marked with an asterisk (*) sign.
- When you are finished, click “SAVE CHANGES”.
